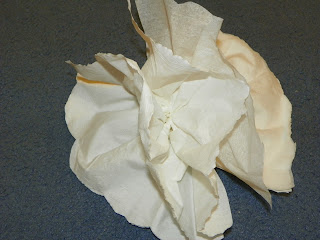
Necessary Supplies:
- Tissue paper (20 inches x 30 inches). Choose one color, choose two colors for more of a flower-effect, choose three hues for some multi-colored FUN! *HINT* Using dinner napkins offers a varied thickness that is less likely to tear when you are manipulating their "puffiness."
- Scissors
- Wire Cutter
- Floral wire. I used silver, but the color is pretty-much hidden once you play with them
- Stack six to eight sheets of paper on top of one another, depending on what type of volume you are looking for. If they are going to be placed on a flat surface (wall or table) they will appear more puffy.
2. Now, fold the sheets into approximately 1 1/2 inch accordion folds, all the way across.
3. Cut about a foot length of floral wire.
3. Prune the ends of the tissue into round shapes, to give them a petal-like look or cut them in a
triangular shape and get a funkier design.
you, separating it from the center one piece at a time. The first time I attempted this
project, I ripped the tissue because of its thinness. Hence, I opt to use the thicker
dinner napkins.
5. After puffing each pom-pom, I work like Edward Scissor-Hands and cut away perfecting
the pom-pom to the size and puffiness I prefer.
Uses:
1. Adding dimension on a wall or table for decoration
2. Creating floral-looking arrangements on the wall of your baby girl's room. *Add two sheets of another color to the top of your layer in Instruction #1 to form the center of your flower. When you are cutting in Instruction #8, cut the center a little shorter, allowing it to appear like the stigma, or center of the flower.*
3. Hanging focal points for a fun party or gathering.
4. Jazz up your dessert table!
HAVE FUN!!


